Followers

Sunday, July 6, 2014

1/12 Scale Arts & Crafts Table Lamp

So begins a new and hopefully fast project.  I am making a companion piece to the floor lamp previously made, but as it is a table lamp, it will be scaled down a bit.  Instead of the 3/32" tubing I am using 1/16" brass tubing for the uprights.  I have ordered some Surface Mount LED chips with magnet wire attached that should go through the smaller tubing just fine, and am replacing the floor lamp bulbs with the same thing.  They are 3 Volt so I should be able to run lights continuously for a long time with 2 AA batteries.

Base begins.  Two pieces are beaded and joined as previous lamp.


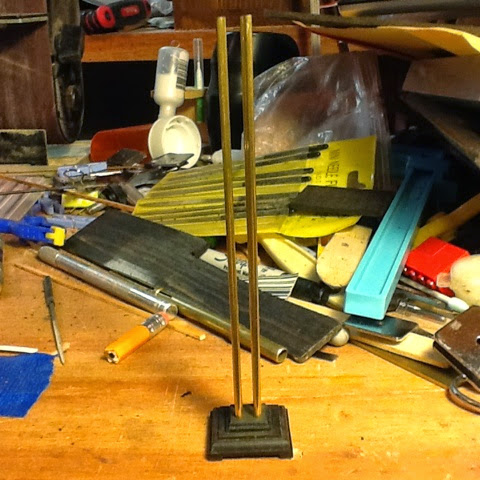
Upright post holes drilled.


Bottom milled out for wiring area.


Base milled to leave corner feet.


Upright posts cut and placed.


Several days and several botched shades later...

Surface Mount LED chips prewired with color coated magnet wire threaded through vertical center tube.


The table lamp is about a half inch too tall so I will have to take it back apart to shorten the main tubes.  Unfortunately they are fixed to the base which will make the shortening tedious.  


 The LED chips work very well and should keep lit on two AA for months.  Once the adjustments are made I will use museum wax to assemble and hold the shade and center tube firmly.  Then I will solder the lamp cord to the magnet wire and be done with it.

Last update...

The base bottoms are milled to fit the wiring recesses and museum waxed in after soldering the lamp cord to the LED wires.  I may have to just glue the shades into position as they move even with the museum wax holding the finials.  That is for another day though.  I will shoot a pic of the lamp bottoms later on.  As it turns out the lamps begin to dim after about a week....  will try larger brick of batteries wired for 3 volt output.

I should add that the rocking chair above is not mine.  Well it is in that I paid good money for it.  It is a William S. Clinger piece I picked up at the last Seattle Miniature Show.  I keep it around to ground me whenever I start feeling too confident about my miniatures.  I have not reached my usual lunatic, "I can do better than that." place that leads to a flurry of sawdust.  The workmanship is exquisite even if the finish is not as I would have done it.  Maybe one day......

gg


Thursday, July 3, 2014

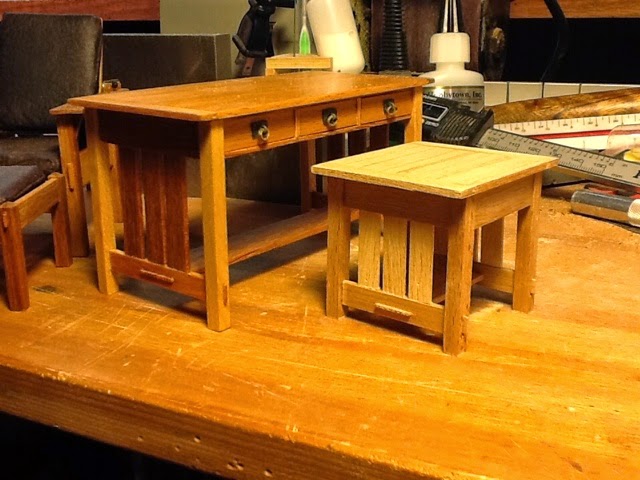
1/12 Scale Mission Side Table

I needed a table for a future version of the floor lamp to rest on so I went down to the shop and made more little sawdust.  It always amazes me how much sawdust comes from such a small task.

Started photo process late into build.  Here the drawer sides are fitted to the drawer guides in the side rails of the drawer box.  Spruce is used for the drawer bottom.


Completed drawer minus front showing the rabbet joinery.


Gluing the center drawer support.  The notch is for the drawer stop clearance when the drawer is closed.


Upper frame tenoning done, ready for mortising.


Measuring for through tenons for bottom rails.


Through tenons done.  Next is to add te 1/16" square spacer strips between the drawer frame and the side rails, and mortise for through tenons for an as yet to be cut center rail piece.


14 mortises later, side frames assembled with spacer strips on rails.


Frame assembly..


Drawer stop visible, clears the underside of the top.


Drawer stop in closed position.


Top boards joined and tenoned for breadboard ends which have been grooved.


Gluing top.


Dry fit of top.  Drawer front has been cut and attached.


Final glue up of table.   


I altered the front of the drawer adding a lower frame member across the bottom of the shallower drawer front to more closely match the library table, fabricated pull and plate and voila!  Ready for sand and oil!


Sanded top to 3000 grit, rest to 600 or so, boiled linseed oil finish applied to all but drawer body and I can now call this project complete.  It will get some carnuba wax in the coming week, but now it is time to turn to the table lamp this table was made for.


Stay tuned, it is gonna be purty. 


Monday, June 16, 2014

1/12 Scale Arts and Crafts Floor Lamp

Needing light for the reading area that is slowly emerging I researched various types of A&C and Mission lamps.  Since I have some brownish greyish Russian mica on the way for lamp shade panels I decided to forgo the typical oak lamp in lieu of black and brass.

This began life as a piece of the Topher Gayle stash of ebony he sent.  After squaring and sanding I put a decorative edge on the top side of the base and upper base with a miniature beading bit.


Some cross milling of the underside of the base I got both feet and a recess to do wiring in.


A dot of super glue and kicker after the base top centered, then marked and drilled for poles.


I cut some 3/32" brass tubing to scale 5ft, and tried it for appearance.


Satisfied that it is taking the path I have in my head I cut and drilled a middle spacer and a top plate.


I have a plan for the shade, and will use brass or ebony as a frame.   Since there will be wires coming up at least one of the tubes I still have to figure out what to do on the top plate.

Update - 

I decided on a "stepped pyramid" top with a cavity that links the 4 tubes to a center top tube.  This cavity will allow wiring to be run however I want.

I beveled the edges of the four tube holes, then cut a piece and cut a cavity with a round nose bit.


After some super glue wicked in from the inside you can see the top of one of the tubes inside.  All four  tube tops are clear and visible.  


Top plate attahed and drilled for top post, which was then placed for photo.  I am thinking that I want to dress up the center plate, maybe with a centered shallow slot around the circumference.


Now I wait for the mica to build the shade.  I tried running the wires through the poles to the top and while a little finicky, they will fit.

The mica I had on order arrived from the Ukraine, and unfortunately it is totally clear.  It will not work for what I needed it to, unless I am able to laminate it with something, so I am again looking around for some brown or orange shellac mica sheets.  In the mean time I will see about a table lamp version of this.

The original dimensions I had for the shade were 12 inch lower sides, but when a template was constructed it looked too small, so I increased the lower sides to a scale 18" and am happy with the over all look.  It is just resting on the top of the top plate in this pic, but when grouped with the chair, hassock and bookcase it looks pretty good.  It iw not really lit, just white paper that reflects well.


I think this may be the final height for the top of the shade, meaning I have to shorten the 4 uprights some.  The new mica arrives tomorrow hopefully!

June 22 update

Mica arrived yesterday and this is what came out of it.


It may end up with a wooden (ebony) frame...  or brass... we will see.  I am leaning toward ebony though.


That is the lower frame done, filled and ready for finish sanding.  Now for the inner brass wire frame and commence with wiring and final assembly.


Final assembly of base to uprights, taking care that right angles are kept.


Top center post drilled for lights and wiring commences.


Smoke test shows light without flame which is always a good thing.  I am using 1.5V GrainOfWheat bulbs and will power the light once in the room box with a stack of AA batteries in parallel so that it will stay lit for 3 or 4 weeks at the State Fair.


Once wiring has been certified I turned a brass finial that goes through the top of the shade into the upper part of the center post.  Here you can also see the 4 heat vent holes.


I still need to fix the middle plate to the posts, and museum wax the upper post and finial in place so that it is removable but stable, in case I want to change to LEDs or 12V GOW.  All that remains is to attach the lamp cord to the green wires inside the base, and fabricate a baseplate to cover the wiring.  A fake plug body where the wire will go through a socket plate to the batteries will complete the lamp build.

Lessons were learned that will speed the table lamp version should I go that route.  I have enough mica that I could even create a couple more for sale.

Stay tuned,  this one is fun.