This began life as a piece of the Topher Gayle stash of ebony he sent. After squaring and sanding I put a decorative edge on the top side of the base and upper base with a miniature beading bit.

Some cross milling of the underside of the base I got both feet and a recess to do wiring in.


A dot of super glue and kicker after the base top centered, then marked and drilled for poles.


I cut some 3/32" brass tubing to scale 5ft, and tried it for appearance.
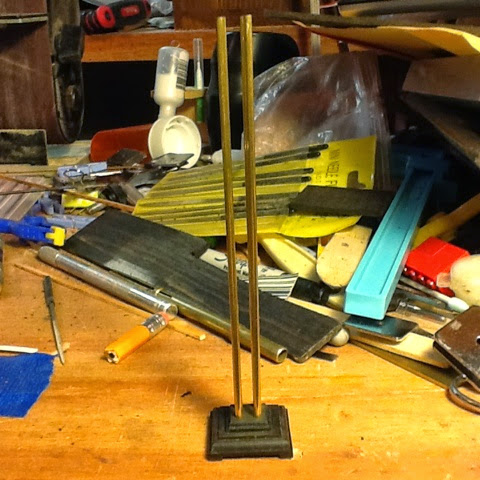
Satisfied that it is taking the path I have in my head I cut and drilled a middle spacer and a top plate.


I have a plan for the shade, and will use brass or ebony as a frame. Since there will be wires coming up at least one of the tubes I still have to figure out what to do on the top plate.
Update -
I decided on a "stepped pyramid" top with a cavity that links the 4 tubes to a center top tube. This cavity will allow wiring to be run however I want.
I beveled the edges of the four tube holes, then cut a piece and cut a cavity with a round nose bit.


After some super glue wicked in from the inside you can see the top of one of the tubes inside. All four tube tops are clear and visible.

Top plate attahed and drilled for top post, which was then placed for photo. I am thinking that I want to dress up the center plate, maybe with a centered shallow slot around the circumference.


Now I wait for the mica to build the shade. I tried running the wires through the poles to the top and while a little finicky, they will fit.
The mica I had on order arrived from the Ukraine, and unfortunately it is totally clear. It will not work for what I needed it to, unless I am able to laminate it with something, so I am again looking around for some brown or orange shellac mica sheets. In the mean time I will see about a table lamp version of this.
The original dimensions I had for the shade were 12 inch lower sides, but when a template was constructed it looked too small, so I increased the lower sides to a scale 18" and am happy with the over all look. It is just resting on the top of the top plate in this pic, but when grouped with the chair, hassock and bookcase it looks pretty good. It iw not really lit, just white paper that reflects well.

I think this may be the final height for the top of the shade, meaning I have to shorten the 4 uprights some. The new mica arrives tomorrow hopefully!
June 22 update
Mica arrived yesterday and this is what came out of it.


It may end up with a wooden (ebony) frame... or brass... we will see. I am leaning toward ebony though.


That is the lower frame done, filled and ready for finish sanding. Now for the inner brass wire frame and commence with wiring and final assembly.

Final assembly of base to uprights, taking care that right angles are kept.


Top center post drilled for lights and wiring commences.


Smoke test shows light without flame which is always a good thing. I am using 1.5V GrainOfWheat bulbs and will power the light once in the room box with a stack of AA batteries in parallel so that it will stay lit for 3 or 4 weeks at the State Fair.

Once wiring has been certified I turned a brass finial that goes through the top of the shade into the upper part of the center post. Here you can also see the 4 heat vent holes.


I still need to fix the middle plate to the posts, and museum wax the upper post and finial in place so that it is removable but stable, in case I want to change to LEDs or 12V GOW. All that remains is to attach the lamp cord to the green wires inside the base, and fabricate a baseplate to cover the wiring. A fake plug body where the wire will go through a socket plate to the batteries will complete the lamp build.
Lessons were learned that will speed the table lamp version should I go that route. I have enough mica that I could even create a couple more for sale.
Stay tuned, this one is fun.


